Divi builder has native support for Google Fonts, but what if you want to use custom web fonts on your website?
Divi’s own font uploader
Divi’s own font uploader
Divi actually lets you upload your own fonts and they do show up in the theme customizer too.
 |
 |
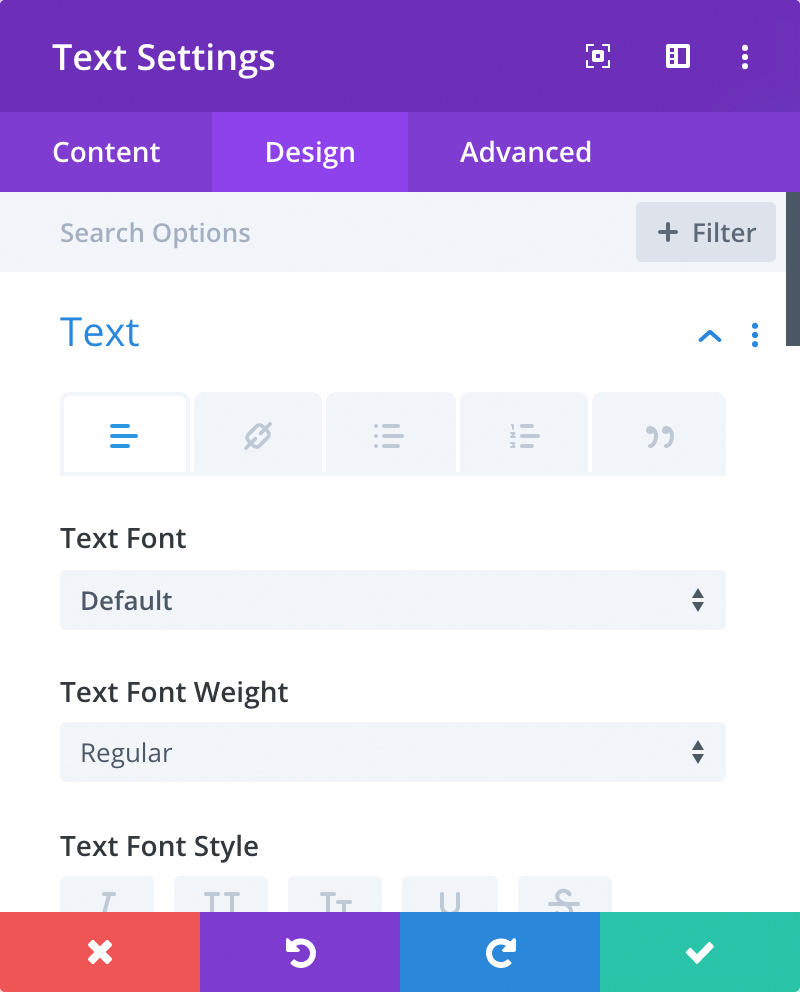
Font uploader can be found inside Divi’s visual builder when you open the design tab in any module that lets you change the text font options, for example, the Text module where you can change the default font.
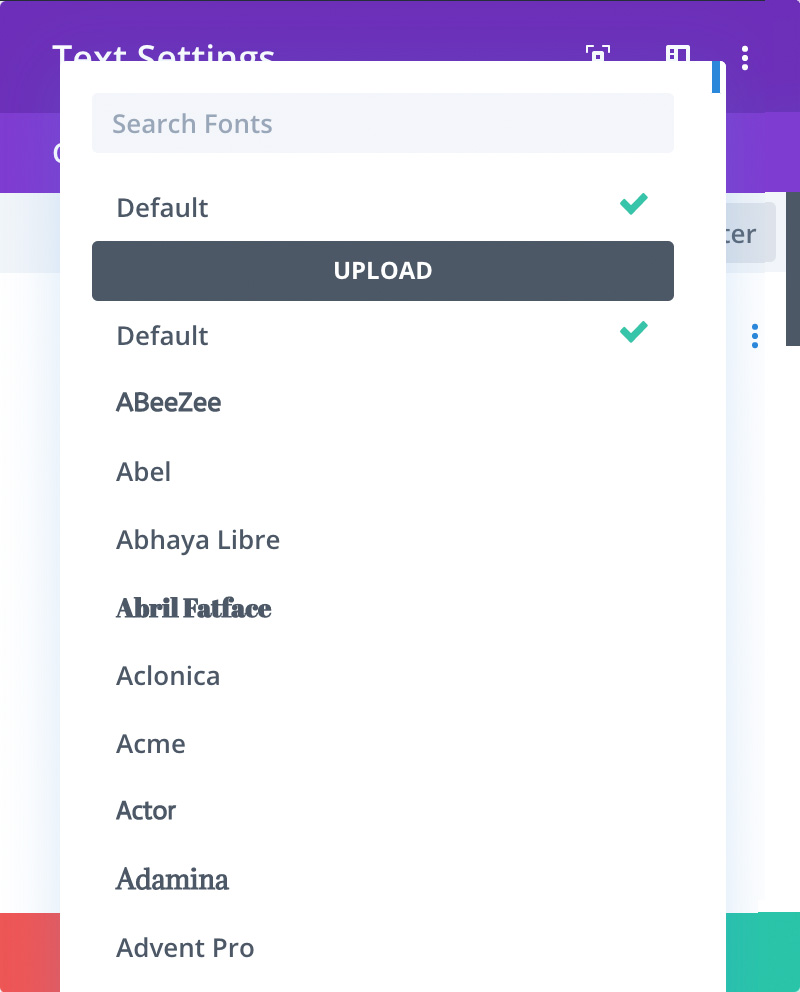
 Select ”Add font” option, simply drag and drop your font file and hit the Upload button.
For some reason, I am not able to add more than one file per font using the current latest version (4.4.4) of Divi. This makes this tool petty much useless if you want to include different font weights for a single-family.
Use a plugin
The easiest way to add a custom font to Divi’s theme customizer is using the Use Any Font -plugin. It’s not free, so you do have to pay a small one time fee starting at $10 for a single WordPress installation.
See the API-key page for more pricing options.
This method is great if you just want to get the job done, the plugin will automatically convert the fonts you upload to all the right formats necessary so you don’t have to worry about any of the technical stuff.
Do it yourself
What if you don’t want to use plugins?
The usual method of adding custom fonts is to upload them to your child theme’s folder and load them using CSS. The internet is full of tutorials on how to do this, so I’m not going to go explain it any further.
The problem with this method is, that they won’t show up in Divi’s theme customizer and you have to manually override the CSS on elements you want to use them.
The proper way
If you have what it takes to generate a web-font kit and add a few lines of code to your child theme’s function.php file, you get the same result as with Use Any Font -plugin.
This method works the same way as Use Any Font plugin under the hood, extending Divi’s function where the default web-safe fonts are added.
First you need to upload your web-font kit to your Divi child-theme’s folder.
Make sure the different weights are defined as one font family, here’s an example of how your font kits CSS should look something like this:
@font-face {
    font-family: 'Bergen Sans';
    src: url('BergenSans-BoldItalic.woff2') format('woff2'),
        url('BergenSans-BoldItalic.woff') format('woff');
    font-weight: bold;
    font-style: italic;
}

@font-face {
    font-family: 'Bergen Sans';
    src: url('BergenSans-Regular.woff2') format('woff2'),
        url('BergenSans-Regular.woff') format('woff');
    font-weight: normal;
    font-style: normal;
}

@font-face {
    font-family: 'Bergen Sans';
    src: url('BergenSans-Italic.woff2') format('woff2'),
        url('BergenSans-Italic.woff') format('woff');
    font-weight: normal;
    font-style: italic;
}

@font-face {
    font-family: 'Bergen Sans';
    src: url('BergenSans-Bold.woff2') format('woff2'),
        url('BergenSans-Bold.woff') format('woff');
    font-weight: bold;
    font-style: normal;
}
You can generate your own web-font kit using one of the free online tools like this one here.
After you have uploaded your font’s we need to enqueue them and include the font in Divi’s font selection.
The code
Simply add this code in to your child theme’s functions.php file:
add_filter('et_websafe_fonts', 'load_divi_custom_font',10,2);

function load_divi_custom_font($fonts) {
  // Load the CSS-file inside your web-font kit
  wp_enqueue_style( 'divi-child', get_stylesheet_directory_uri() . '/webfonts/stylesheet.css' );
  // Add font to Divi's font menu
  $custom_font = array('Bergen Sans' => array(
    'styles'        => '400italic,700italic,400,700',
    'character_set' => 'latin',
    'type'          => 'sans-serif',
    'standard'      => 1
  ));

  return array_merge($custom_font,$fonts);
}
Adding multiple fonts
If you want to add more than one font family, simply upload your additional font kit and add additional element inside the array like this:
add_filter('et_websafe_fonts', 'load_divi_custom_font',10,2);

function load_divi_custom_font($fonts) {
  wp_enqueue_style( 'divi-child', get_stylesheet_directory_uri() . '/webfonts/stylesheet.css' );
  // Add multiple fonts to Divi's font menu
  $custom_font = array('Bergen Sans' => array(
    'styles'        => '400italic,700italic,400,700',
    'character_set' => 'latin',
    'type'          => 'sans-serif',
    'standard'      => 1
  ),
  'Your Second Font' => array(
    'styles'        => '400italic,700italic,400,700',
    'character_set' => 'latin',
    'type'          => 'sans-serif',
    'standard'      => 1
  ));

  return array_merge($custom_font,$fonts);
}
I hope you found this article useful!
Disclosure: I only recommend products I would use myself. This post may contain affiliate links where I may earn a small commission if you choose to purchase through them.

Ville Teikko
Ville Teikko is an award-winning creative & digital marketing specialist with over 20 years of experience in the digital design and advertising industry. Currently working as a Head of Digital at WaveCrest Finland.